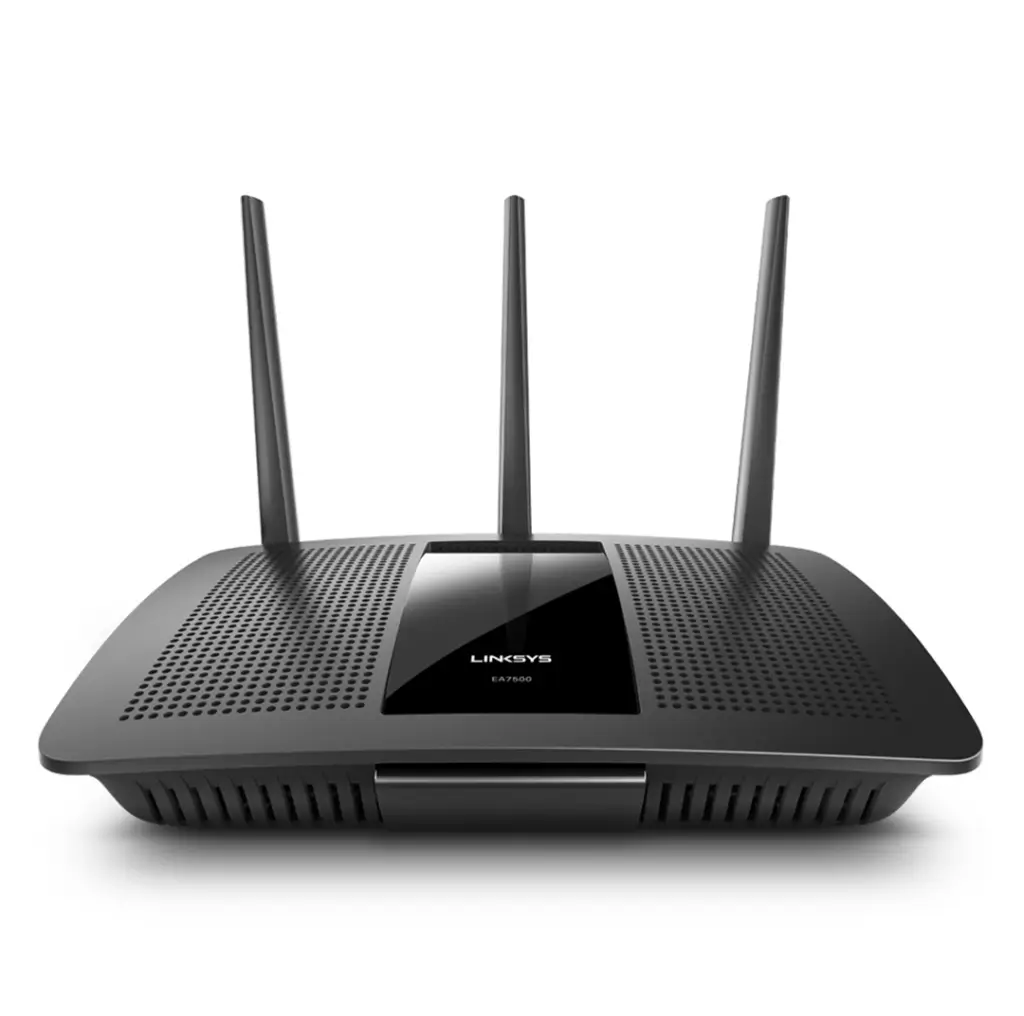
Linksys EA7500 Setup
With the help of a top-notch networking device, you can obtain a magnificent network solution. So, owning an optimal device is necessary to ensure a high-speed internet connection. The Linksys EA7500 is one of the best dual-band routers with the latest features. To make the most of this, you must know the complete process for the Linksys EA7500 setup.
Setting up the router is crucial to ensure the standardized functioning of the router. So, you must know the proper procedure for the setup. You can set up the router appropriately through the user interface. So, all you need to do is log into the router and then you can access all settings of the router.
To set up the router, you must know the proper process. That’s why we have made this post to help users with setting up their router. You can learn the complete procedure for the setup from this blog. We will also discuss some other essential procedures you must know. Then, we will go over the issues you can face with your Linksys router.
Necessities For Linksys EA7500 WiFi Router Setup
To set up the router, there are a few things you must have. With these requirements, you can set up the router properly. You require the following things for the setup:
Linksys
app
An Ethernet
cable
Linksyssmart
wifi.com
An active
connection
Account
details
Smartphone
or PC
You must have these necessities to set up the router successfully. Further, we will go over the troubleshooting methods.
How to Setup Linksys EA7500 WiFi Router?
To set up the router, there are two methods you can use. You can either use the web browser or app to set up the router successfully. For the former method, you can use the linksyssmartwifi.com address to log in. Additionally, you can use the Linksys app for the other method. You can follow the below-mentioned instructions for the setup:
Linksys EA7500 Setup Via Web Browser
- Primarily, connect your device to the router’s network.
- An Ethernet cable can also be used to connect your PC to the router.
- Now, open a web browser and enter linksyssmartwifi.com in the address bar.
- When the login page appears, enter the login credentials of your account.
- If you don’t have an account, you can create one from the web interface.
- Hereon, add the device and set it up following the instructions.
- You can configure the network name, password, and login details from the interface.
- At last, save the changes you made, and connect your devices to the router.
Linksys EA7500 Router Setup Using the Linksys App
- First of all, install the Linksys app on your smartphone.
- The app is available on both the Play Store and App Store.
- Now, open the app and log into your account using the details.
- Otherwise, create your account using your accurate information.
- After that, add the device to the app and follow the instructions.
- You must configure the Linksys router’s settings accordingly.
- Consequently, save the changes and start using it properly.
These are the steps for the Linksys EA7500 router setup. Now, you have complete access to the router’s settings. You can modify the settings properly and make the most of it.
How to Login to Linksys EA7500 Smart WiFi Router?
To log into the router, you can do so either from the web browser or the app. The login will give you complete access to the router’s settings. You can log into the router, by following the steps below:
- To begin with, form a connection between your device and the router.
- You can also use an Ethernet cable to connect your computer to the router.
- Now, open a web browser and enter linksyssmartwifi.com in the URL bar.
- Hereon, on the login screen, enter your account details to log in.
- If you don’t have an account, you can create one from the interface.
- The web interface of the router will appear on the screen.
- In the end, you can configure the router’s settings precisely.
These are the steps for logging into the router successfully. Once you are logged in, you can set up the router and proceed with the Linksys EA7500 configuration.
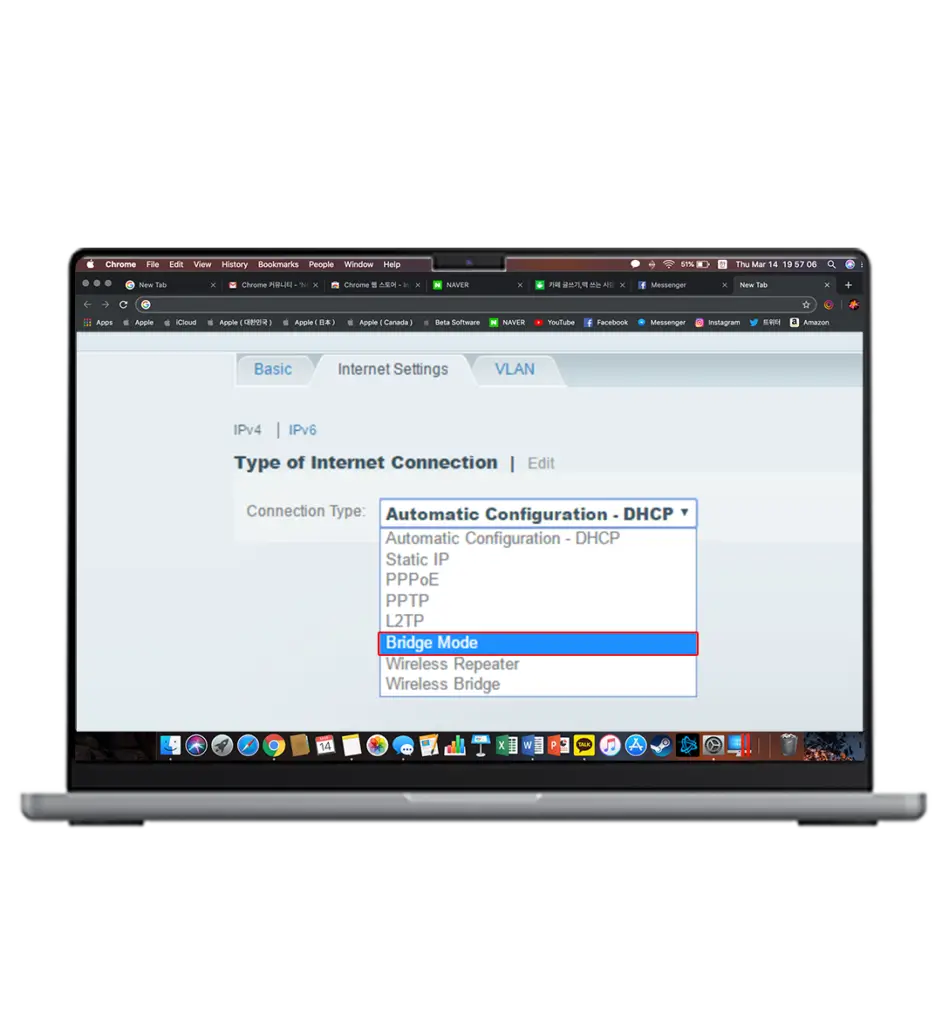
What are the Steps to Enable Linksys EA7500 Bridge Mode?
Setting up bridge mode on the router can prove to be extremely beneficial for the users. With the help of this feature, you can extend your router’s range. The steps for enabling the bridge mode are as follows:
- Firstly, log into the router’s web interface using the correct login credentials.
- Now, from the interface and the settings, go to the Connectivity
- Hereon, from this page, go to the Internet Settings section and tap
- The drop-down menu will appear on the screen and you can enable the Bridge Mode.
- After that, you need to configure the router’s settings accordingly.
- Remember, that several settings will be disabled during the bridge mode.
- Also, you can only access the router’s settings using the IP address.
- Eventually, you can save the changes by clicking the Apply
These are the steps for the Linksys EA7500 configuration in the bridge mode. Once you are done with the changes, you can connect two routers and enjoy an extended network.
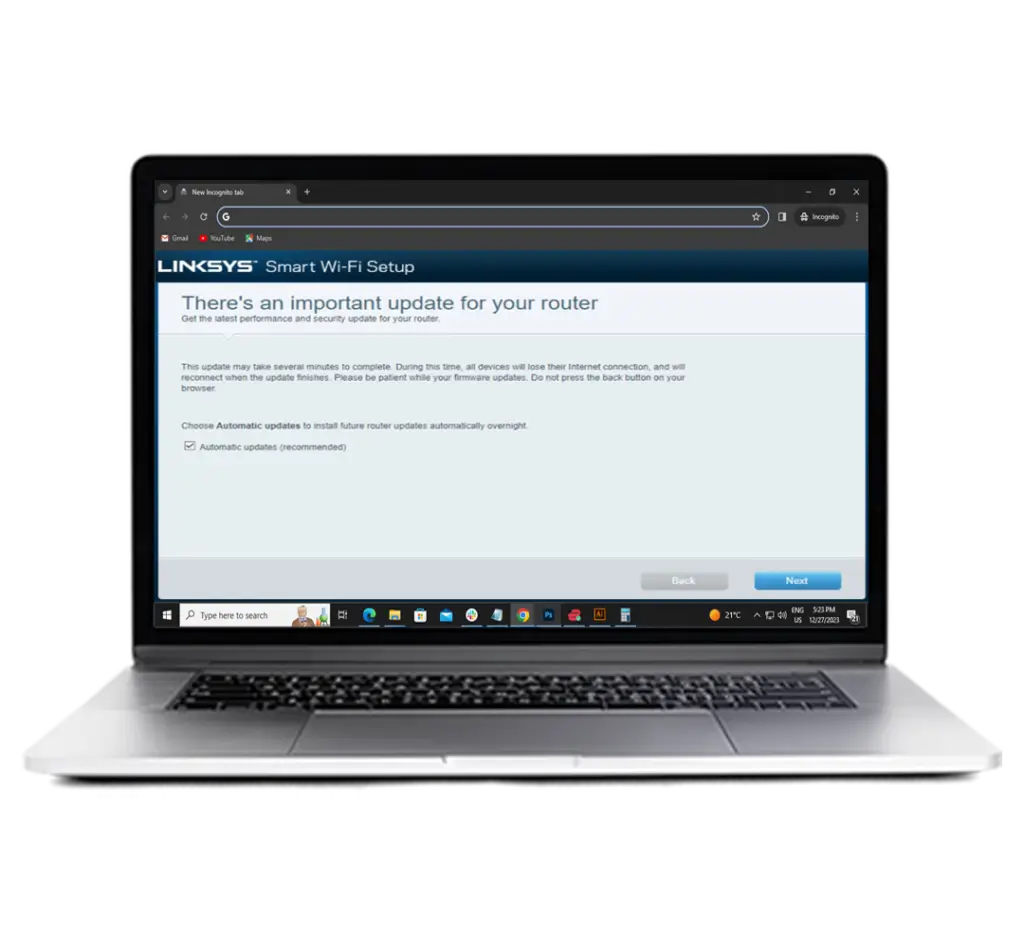
How to Update Linksys EA7500 Router Firmware?
Updating the firmware of the router is necessary to enhance its functionality. The firmware is responsible for keeping the working of the router smooth. Follow the below-mentioned steps to update the firmware:
- Initially, you need to install the firmware file on your system.
- Now, log into the router’s web interface using the login details.
- Now, from the interface, go to the Router Settings
- Hereon, from this page, go to the Advanced Settings
- From this section, you can go to the Firmware Update segment.
- After that, upload the firmware file you downloaded.
- Give the router some time to update the firmware successfully.
- Lastly, once the firmware is upgraded, the issue within the router should be gone.
These are the steps to update the firmware of the Linksys router. Now, the router should be working smoothly and glitches should be gone. Ensure to update the firmware, whenever one is available.
Why is Linksys EA7500 Not Connecting to the Internet?
The Linksys EA7500 not connecting to the internet is a serious issue that numerous users face. Such issues could arise due to a number of reasons. Some common factors responsible are as follows:
Insufficient power
supply
Poor connection
with modem
Issues from the
ISP end
Network
interferences
Router
glitches
These are some common causes for the router not connecting to the internet. Now that you know the reasons, you can fix the issues properly.
FAQs
There’s no default username and password for the Linksys EA7500. You need to create an account to log into the router’s user interface. To create your account, you can either use the web browser or the Linksys app.
To find the IP address of the Linksys EA7500, connect your PC to the router. Now, go to start, type Cmd, and press enter. When the command prompt appears, enter Ipconfig and press enter. You can find the default IP address next to the default gateway.
Yes, you can set up the Linksys EA7500 as a WiFi repeater. To do so, all you need to do is log into the router’s web interface. From the interface, you can select the repeater mode, then connect it to your router, and configure the settings accordingly.
Yes, the Linksys EA7500 supports VPN. To configure the VPN settings, you need to log into the router’s web interface. From the interface, go to the VPN settings, and then you can modify the settings accordingly.
Yes, you can configure the Linksys EA7500 as an access point as well. To do so, you must log into the router’s web interface. Once you are logged in, you can configure the settings accurately. Afterward, from the settings, you can change the mode to the access point.